Tuesday, January 15, 2013

Showtime!

The other day I drove myself deep into the woods of lower Litchfield County, with its stone walls, rolling hills, barns, and homes with stately pillars.
My destination:  the Gunn Memorial Library, in the bucolic town of Washington, Connecticut.

 There the members of the Connecticut Fiber Arts Collective gathered to hang our latest show, Threads, Fabrics, and Dyes as Art, in the library's Stairwell Gallery.

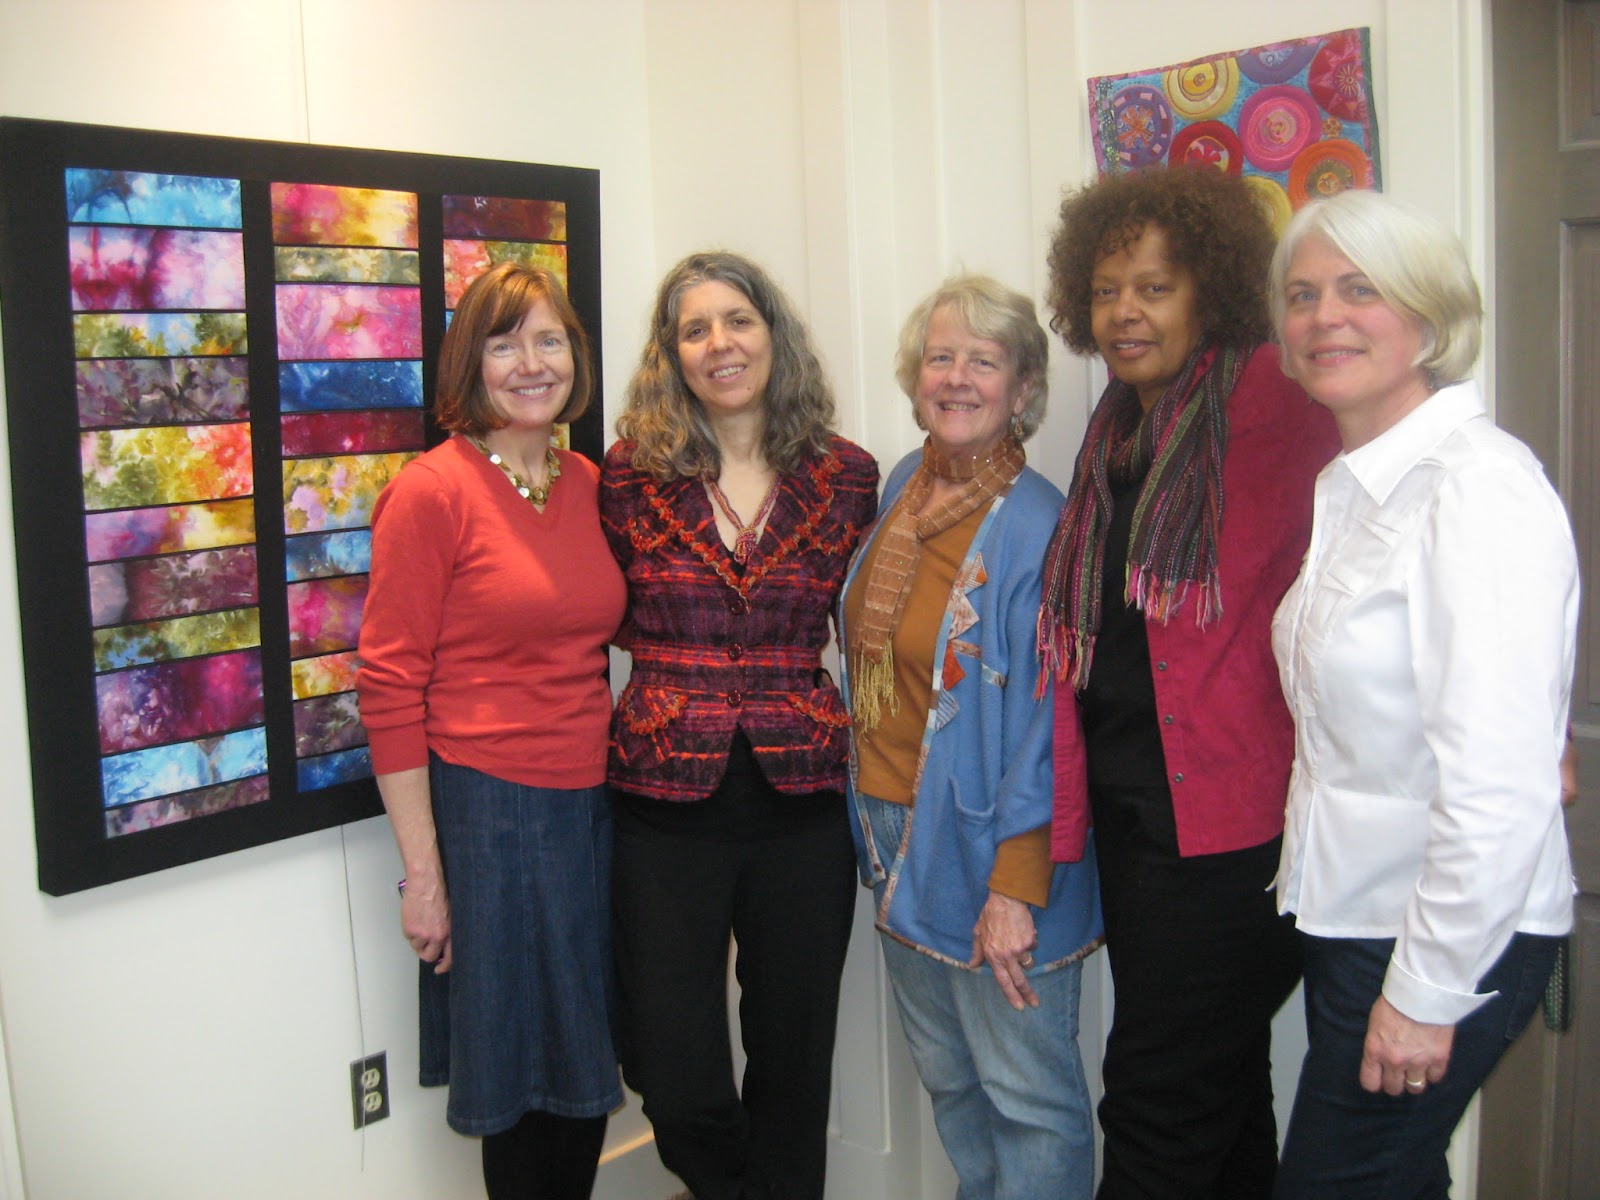
And here we are, the Connecticut Fiber Arts Collective, posing in front of one of Carol Eaton's lovely ice-dyed pieces.  Left to right:  Mary Lachman, Carol Vinick, Diane Cadrain, Rosalind Spann, and Carol Eaton.

On Saturday, January 12, 2013, we hosted a well-attended reception and basked in peoples' admiration of our work.

Here's Carolyn Hartman, in black, the library staffer who cheered us on and helped make it all happen


Here's our own Roz Spann talking to a reception guest


Here's Carol Vinick explaining one of her pieces to a reception guest

And here I am, posing next to three of the six pieces I have in the show:  Edge of Winter, Farmington Valley Fall, and Fall Picnic.

But the Gunn Library show isn't the only one where my work is hanging this month.  Another is Fiber and Friends, Ed Johnetta Miller's show at the Windsor Art Center, a former freight depot in Windsor, CT, now being put to beneficial use as a public art space.


Here's EdJohnetta, who honored me by her invitation to join her show.

Here's Honeysuckle Eve, my contribution to EdJohnetta's show.  The caption underneath says, "Honeysuckle Eve was a twining vine in the back garden until one evening when she took on human form to play with the fireflies."  It was originally created in 2008 for a show, sponsored by the American Quilting Society, called A Touch of Magic.

I also have work in two other shows this month.  One is hanging at the Unitarian Society of Hartford, my religious congregation, with its spaceship building:

I have four pieces in that show.  Here I am next to one of them, a paper collage called The Way I Feel about Knitting:

Finally, I also have 25 pieces in my own solo show in the community room of the Farmington Public Library, Farmington, CT.

Many thanks to my lovely daughter Lucia for helping me to create this poster for my solo show


And just yesterday, I learned that a library patron who visited my show wants to buy one of the pieces in it!  Glowing Cabbage III will be turned over to the buyer on the day my husband Joe and I strike the show at the end of the month.

Here's Glowing Cabbage III, bound for glory in the home of a private collector.


Saturday, January 5, 2013

Natural Inspirations

Offering
What was I thinking?
Just a few months ago, I had a solo art quilt show, Twigs and Tides, at the University of Connecticut Health Center.
Now, only half way around the calendar, I'm having another one?
Well, I am.
Natural Inspirations is now hanging in the community room of the Farmington Public Library. 6 Monteith Drive, Farmington, CT.  That's just off Rt. 4, a few miles west of the center of town.

My sister Jerol and brother-in-law Larry helped me hang it, bless their hearts.


Two Ways of Looking at Seaside Goldenrod

Jack O'Lantern Mushrooms
Buddhist Temple II

Buddhist Temple I


Sunday, December 2, 2012

Connecticut Landscapes: Now Open for Viewing


Farmington Valley, Fall: one of my six pieces hanging in the Connecticut Fiber Arts Collective's new show, Connecticut Landscapes

It was a raw December day, with the temperature hovering just below freezing and a chilly mist hanging in the air.  Nevertheless, the members of the Connecticut Fiber Arts Collective collected themselves from all over the state, driving from Shelton and Bethany, Waterbury and West Hartford to converge at the Prospect Public Library in the town of Prospect, CT.  There, we hung our show, Connecticut Landscapes, which will grace the library's community room until the end of the month.

It's a lovely library, tucked away in a corner of the town center

Here are Carol Eaton and Mary Lachman, cataloging the works we hung on the wall in preparation for composing a price list

Here's Roz Spann, who always seems to have a bag of useful tools about her person, putting an emergency hanging wire on one of my pieces which was so new I had neglected to attach a hanger to the back.  Thanks, Roz!


Now here's a mini-gallery of my pieces that hang in this show.  You already saw Farmington Valley: Fall at the head of this blog entry.  Here are the other five pieces:

Deconstruction

Oak Leaves and Raindrops


Windy Ravine

Fall Picnic I
Edge of Winter
Next, the Connecticut Fiber Arts Collective takes this show to the Gunn Memorial Library and Museum, Washington Depot, CT, where it will hang from mid-January to mid-March.

Friday, November 30, 2012

How to Pin a Paradox

Sometimes I find fun where I didn't necessarily expect it.  Like learning to sew pieced curves together. 
Thanks to Mary Bajcz of Milford, Michigan--Scrap Happy Mary--I've now mastered this tricky process.  It's liberating...and rewarding.
It may not be obvious, but trust me, sewing two curved pieces together takes some skill, because when you flip the curved pieces right sides together to sew them, their shapes are then radically opposite one another: convexities on top of curves, curves on top of convexities.  It took me some practice to learn to pin these paradoxes together.
I tried to explain to my husband Joe why this process is so touchy, but he got hung up on the concept of right sides together, so I never got to explain it.
Anyway.
Mary Bajcz brought her magic to the Farmington Valley Quilters at a workshop held at Sew Inspired Quilt Shop on November 15, 2012. Through her, I mastered this technique, which is liberating--and fun--because it requires use of a rotary cutter freehand to cut cuves in blocks of fabric stacked on top of one another.  The stacked pieces are then shuffled and sewn together in random order. I started making these pieced leaves in Mary's class, and continued after I got home, until I had 20 curved leaf units. 
In the photo above, I've already sewn the 20 pieced squares, stem down, to one another in 10 pairs of 2.

Believe me when I tell you that curves end up opposite one another when you flip the pieces right sides together for sewing.
I learned that there are two important techniques required for sewing these opposing pieces together. 
One is to make hatch marks across the cut curves before flipping the pieces right sides together and pinning them for sewing.  The hatch marks below are made with disappearing ink:
When I flip these pieces, I make sure that the hatch marks are on top of one another, start pinning in those spots, then carefully pin the areas between those initial pins. 
The other important technique is to use a very narrow seam allowance.  I'm sorry the photo below is a little blurry, but you can still see what I want you to see: the size of the seam allowance.  To create a seam allowance of about 3/16ths, I'm running the right hand edge of the pinned fabric exactly along the inside of the right toe on my open toe foot.  Like this:
Mary Bajcz has more on her website, and I encourage you to go there and look at a few of the ways you can apply this artful technique.   https://sites.google.com/site/scraphappymaryb/
Have fun!


Saturday, October 27, 2012

...And then a bulb went off

On the eve of Frankenstorm, a major hurricane expected to combine with two other weather systems to administer a major slap to my corner of the world, I did what any other gardener would do:  I planted bulbs.


After all, what's better after a planting than a good, soaking rain?  And I'm keeping my fingers crossed that at the end of the day, Frankenstorm won't amount to much more than that.

The truth is, storm or not, now, October, is the time to get some bulbs into the new garden Joe and I created last fall.  If it were going to get done, this would be the time.

Last fall, we created this garden by covering a covered a weedy patch of "lawn" with newspapers and mulch.  Then we waited.


 In the spring, I filled it with plants I knew would grow well there because they already grew well in the existing garden of which this new garden was an extension:  heucheras, persicarias, Japanese painted ferns, brunneras.  A silver and maroon color scheme.  Eventually, we had a garden that lived up to the promise I'd envisioned for it.

Silver and Maroon:  Persicaria Red Dragon and Heuchera Mars

The new garden has done so well, and occupies such a prominent position in our yard, it made sense to add bulbs to extend its display into the spring.

First, though, I'd have to cut back the butterfly bush which I'd allowed to overtake its eastern end.  I should have cut it back in the early spring, but at the time, I was putting a lot of energy into creating a solo art quilt show, and cutting back the butterfly bush wasn't a priority.  As a result, it grew to look like this, and there was no way I could plant bulbs in this bed with this behemoth looming over it:

 So I cut back the butterfly bush to clear the way for bulbs.

 My taste in bulbs runs to the small bulbs, like those for crocus, snowdrops, and grape hyacinths.  There are two reasons for this preference.  One, the small bulbs tend to naturalize, spreading their springy selves into larger and larger areas as time passes.  And two, when their foliage fades, the yellowing leaves of the smaller bulbs aren't as much of an aesthetic nuisance as the wilting foliage of larger plants like daffodils.

I took myself to a local nursery to which I'd been given a gift certificate by my kind and generous neighbors after my sister Linda died in September 2011 at age 72 of Alzheimer's disease.  Linda would like knowing that I'm planting these bulbs.

Here's what I chose:
50 Chionodoxa Blue Giant (Glory-of-the-Snow)
Plant 5" deep and 12 per square foot

50 Chionodoxa Pink Giant (Glory-of-the-Snow)
Plant 5" deep and 16 per square foot 
64 Muscari (Grape Hyacinth)
Plant 5" deep and 16 per square foot

15 Galanthus Woronowii (Snowdrops)
Plant 5" deep and 12 per square foot

25 Puschkinia (Lebanon Squills)
Plant 5" deep and 16 per square foot 


Some bulbs have to be handled specially to prevent squirrels from digging them up and eating them.  Crocus are high on the list of squirrel favorites.  But I didn't have any crocus.  I did have grape hyacinths, which squirrels are known to dislike.  So no need to squirrel-proof those.  But what about the snowdrops, glory-of-the-snow, and Lebanon squills?  I didn't want to take any chances of destruction by squirrels, so I soaked them in a foul-smelling liquid called Repels All and laid them out to dry overnight.
The next day, I dug five holes at symmetrical locations in the new garden.  The labels on the puschkinia, chionodoxa, and galanthus all said they needed to be buried 5 inches deep and either 12 or 16 bulbs per square foot.  I tried to make my holes about a square foot, and they were about that, and  about five inches deep.  Pretty soon it became clear that, based on my number of bulbs, the five holes were deep enough but maybe not big enough. 

Tough, I decided.  This was hard work.  The soil here is heavy, hard-packed clay. 

That clay is such an inhospitable base for any growing thing that it needs the amendment of organic matter to make it lighter and more friable.  I have a compost bin to give me a supply of organic matter, so I dug a basket of compost to put in all the holes.


Each hole received its share of compost and equal numbers of chionodoxa, galanthus, and puschkinia.  Some gardeners suggest adding other nutrients, such as bone meal, to the holes.  Others say that the smell of bone meal is an invitation to squirrels.  I decided to go by the KISS rule and forget about the bone meal.

So these bulbs are going to have to fight it out for space.  A little.  Life is tough in the plant kingdom.  But that meant that I had to find another place for the grape hyacinths (muscari), which create lavender blooms and a sweet smell that defines spring.

For them, I decided on a semi-circle around the birdbath and set to work digging it out.


There were 64 grape hyacinth bulbs, and once I'd layered the C-shaped trough with a dose of compost, I laid those bulbs evenly on their bed of organic matter.  The package said to plant 16 bulbs per square foot.  That means I needed about four square feet.  I didn't measure, I just eyeballed, but looks like I got it close to right.

Another squirrel-deterrent was to mulch the area over so that the rodents wouldn't know the earth had been disturbed.  I got four bags of this stuff:

I'm not crazy about the black--I go for the natural earth color--but this late in the season, Home Depot doesn't have a lot of choices in mulch.  The guys there said they were trying to sell mulch to make way for Christmas trees.

Here's the culmination of all that digging and mulching.  I left poles in the ground to remind me of the location of these bulbs. Don't I want to be surprised?  No, I want to know where to direct my obsessive rays of hope in the spring.