Saturday, July 13, 2019
This blog has moved
I've moved my blog to a new location and this site is no longer being updated. My new site is dianecadrain.com . I hope you'll visit, and bookmark, this new site. See you there!
Tuesday, November 13, 2018
The Serial Mom Shower Curtain
Waverly Ivy! It was the pattern wallpaper in Serial Mom's kitchen! You know Serial Mom. She killed people for violating rules and standards.


And now, the fabric version of Waverly Ivy is going to be part of a new shower curtain I'm making. The fabric clearly says, "Dry Clean Only." And I'm putting it in a shower curtain!
Thanksgiving is coming, and so are visitors. The situation creates a need for spiffing things up around here, including replacing a certain tattered, faded shower curtain.
Shopping for fabric for a new one, in the first fabric store I visited, I found one type and color I could live with. But the store did not have the six yards I needed.
I looked online for fabric. It was horrendously expensive.
I looked online for ready-made shower curtains. Nothing I liked.
This was taking too much time. I didn't want to take half a morning going to yet another fabric store and coming up empty.
So I decided to piece a new shower curtain together with fabric from my stash. It took even more time than visiting another fabric store would have: Never mind half a morning, it took me most of an afternoon and into the evening.
By careful measuring, I cut eight not-exactly-matching pieces and cobbled them together into a single piece, 72 inches high and 142 inches wide.

So what if they don't all match? They're close enough. And this fabric has been sitting around in my stash for 100 years anyway, so it might as well get used.
 I really like the Waverly Ivy, so I bought a few yards at discount upon the closing of my favorite fabric store, the late lamented Fabric Place of Cromwell, Connecticut. I had the most yardage of that one kind, so most of the shower curtain consists of that.
I think John Waters must have liked Waverly Ivy too, in his film Serial Mom, or at least thought it typical of suburbia. Do you know the film? In it, Kathleen Turner plays a woman who kills people for violating rules like not wearing white after Labor Day. Patty Hearst gets it for that infraction. Yes, that Patty Hearst, acting in the John Waters film. Serial Mom bludgeons her with a telephone for wearing those shoes.
And Serial Mom had Waverly Ivy for her kitchen wallpaper! Yes she did! Why do I remember that? Because it was Waverly Ivy!
But here's the thing. Serial Mom killed people when they failed to obey rules and standards. I just want to say that this Waverly Ivy fabric came with a plain warning written in the selvage: "This fabric has been treated with Scotchgard. Dry clean only."
But I'm using it for a SHOWER CURTAIN! It's gonna get wet and it's gonna get washed! It's not gonna get dry cleaned!
Do you think she'll bludgeon me with a sewing machine?


And now, the fabric version of Waverly Ivy is going to be part of a new shower curtain I'm making. The fabric clearly says, "Dry Clean Only." And I'm putting it in a shower curtain!
Thanksgiving is coming, and so are visitors. The situation creates a need for spiffing things up around here, including replacing a certain tattered, faded shower curtain.
Shopping for fabric for a new one, in the first fabric store I visited, I found one type and color I could live with. But the store did not have the six yards I needed.
I looked online for fabric. It was horrendously expensive.
I looked online for ready-made shower curtains. Nothing I liked.
This was taking too much time. I didn't want to take half a morning going to yet another fabric store and coming up empty.
So I decided to piece a new shower curtain together with fabric from my stash. It took even more time than visiting another fabric store would have: Never mind half a morning, it took me most of an afternoon and into the evening.
By careful measuring, I cut eight not-exactly-matching pieces and cobbled them together into a single piece, 72 inches high and 142 inches wide.

So what if they don't all match? They're close enough. And this fabric has been sitting around in my stash for 100 years anyway, so it might as well get used.

I think John Waters must have liked Waverly Ivy too, in his film Serial Mom, or at least thought it typical of suburbia. Do you know the film? In it, Kathleen Turner plays a woman who kills people for violating rules like not wearing white after Labor Day. Patty Hearst gets it for that infraction. Yes, that Patty Hearst, acting in the John Waters film. Serial Mom bludgeons her with a telephone for wearing those shoes.
And Serial Mom had Waverly Ivy for her kitchen wallpaper! Yes she did! Why do I remember that? Because it was Waverly Ivy!
But here's the thing. Serial Mom killed people when they failed to obey rules and standards. I just want to say that this Waverly Ivy fabric came with a plain warning written in the selvage: "This fabric has been treated with Scotchgard. Dry clean only."
But I'm using it for a SHOWER CURTAIN! It's gonna get wet and it's gonna get washed! It's not gonna get dry cleaned!
Do you think she'll bludgeon me with a sewing machine?
Wednesday, November 7, 2018
Explorations: The Catalog
At long last, here's the catalog of the art quilt exhibit to which I gave five months of my time this year.


Tuesday, November 6, 2018
Quilting, Camaraderie, and Critiquing
It's taken me 69 times around the sun to go to my first quilt retreat--something that most other serious quilters do regularly--and that retreat was both warm and fuzzy while also bracing and invigorating. To my great surprise, and beyond my expectations, the setting turned out to be a rolling, wooded one, with yellow leaves drifting across the landscape and the smell of woodsmoke in the air. The weekend was wonderful on that basis alone, and you can read about the wonderfulness here:
https://stitching-it-all-together.blogspot.com/2018/11/i-went-on-quilt-retreat-i-found-cedar.html
Besides the magical setting, the retreat offered quilting camaraderie: New friendships made and older ones renewed and strengthened. Quilting is by its nature a solitary activity, except maybe in rural areas like Pennsylvania Dutch Country. So it's validating to come together in one room with others who also have a passion for this demanding and rewarding art form.
 There was a lot of clackety clacking in that room when everyone got going!
One high point of the weekend for me--aside from discovering, and walking through, a cedar swamp on the property--was a quilt critique offered by Sandra Sider, a SAQA (Studio Art Quilt Associates) member who has a lot of experience at this.
I offered my quilt-in-progress, Spirit Moving Over the Waters, for a critique. It's a smaller quilt on top of a larger quilt. The smaller quilt is a collage of photo transfers of sand ripples:
The larger quilt on which the smaller one will be mounted is made of blue silk, sewn with rippled lines of stitching. It's been layered with Fabric Magic, so that when steam is applied, the blue silk will shrink and create dramatic raised ripples.
Here are both parts, mounted for critiquing. That's Sandra Sider there, sharing her thoughts.

One suggestion was that the stair-step arrangement of the smaller quilt was jarring.

It was suggested to convert it into a diamond shape, which I did, by basting:

I think it looks kind of cool that way, but possibly too stylized. And when I put it on an angle on the blue silk rectangle, as someone else suggested, it looks like a UFO.
Then somebody else suggested a more natural edge on the smaller piece, eliminating the troublesome stairstep arrangement, but looking more organic, possibly more like a real shoreline. I like that idea and will try it, temporarily, on one of the four sides of the diamond. Just to see.
It was also suggested that my background quilt may not be big enough, as the Fabric Magic, with which it is layered, will shrink 30 percent when steam is applied. Can this blue rectangle shrink 30 percent and still leave a decent margin around the smaller quilt? Now I'm thinking about starting all over again with another piece of blue silk. Gah! Do I know how to have fun or what?
These are things to think about on the road to completion of this quilt. The feedback is refreshing, and even if I don't agree with everything, it helps me see my work with new eyes.
A couple of other ladies had their quilts critiqued, including this one, which is to be part of a tribute to women artists that will be hanging soon in the Tolland Library, Tolland, Connecticut. This particular quilt, one of many this quilter is making, is a tribute to the photographer Vivian Maier. Do you know about Vivian Maier? She was a nanny who took candid photos on the streets of New York as she went about the city with her charges. There was even a film about her: http://www.vivianmaier.com/film-finding-vivian-maier/.
Here's an 18 x 24 art quilt honoring her, and Sandra Sider giving her comments:

 We all liked the way the artist mimicked the scalloped edge of old-time photos, complete with black photo corners, and included a slice of Manhattan streetscape in the background.
Here's another piece, this one, like mine, a work in progress. The artist constructed this seahorse from dozens of sewn circles, called yo-yos, made from recycled prom dress fabric:
 Gorgeous, isn't it? It's going to be part of a larger seascape, with the sea horse's tail wrapped around a piece of underwater vegetation.
Part of the value of the critique process also enhanced the group dynamic, with all participants going into it as interested and invested art quilters. Satisfying all around.
I haven't told you about the accommodations yet. They were monastic and scrupulously clean. I slept like a rock in that little bed.
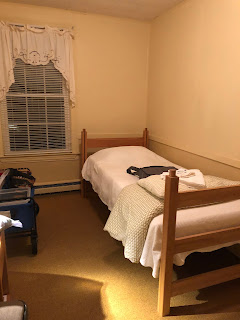

It was inconvenient to have the room's one electrical outlet on the opposite side from the bed. But that's why God invented extension cords.
So it was all good.
And I'm grateful to be able to come home to this:
https://stitching-it-all-together.blogspot.com/2018/11/i-went-on-quilt-retreat-i-found-cedar.html
Besides the magical setting, the retreat offered quilting camaraderie: New friendships made and older ones renewed and strengthened. Quilting is by its nature a solitary activity, except maybe in rural areas like Pennsylvania Dutch Country. So it's validating to come together in one room with others who also have a passion for this demanding and rewarding art form.

One high point of the weekend for me--aside from discovering, and walking through, a cedar swamp on the property--was a quilt critique offered by Sandra Sider, a SAQA (Studio Art Quilt Associates) member who has a lot of experience at this.
I offered my quilt-in-progress, Spirit Moving Over the Waters, for a critique. It's a smaller quilt on top of a larger quilt. The smaller quilt is a collage of photo transfers of sand ripples:
 |
| Spirit Moving over the Waters is intended to be a smaller quilt mounted on a larger one. This is the smaller quilt. |
Here are both parts, mounted for critiquing. That's Sandra Sider there, sharing her thoughts.

 |
| That's me, listening and thinking |

It was suggested to convert it into a diamond shape, which I did, by basting:

I think it looks kind of cool that way, but possibly too stylized. And when I put it on an angle on the blue silk rectangle, as someone else suggested, it looks like a UFO.
 | ||
| If this smaller quilt (brown) sat on an angle on top of the rectangle of the larger quilt (blue)., it might look like a flying saucer. It weirds me out a little. I didn't intend for the Spirit Moving Over the Waters to be an extra-terrestrial. |
Then somebody else suggested a more natural edge on the smaller piece, eliminating the troublesome stairstep arrangement, but looking more organic, possibly more like a real shoreline. I like that idea and will try it, temporarily, on one of the four sides of the diamond. Just to see.
These are things to think about on the road to completion of this quilt. The feedback is refreshing, and even if I don't agree with everything, it helps me see my work with new eyes.
A couple of other ladies had their quilts critiqued, including this one, which is to be part of a tribute to women artists that will be hanging soon in the Tolland Library, Tolland, Connecticut. This particular quilt, one of many this quilter is making, is a tribute to the photographer Vivian Maier. Do you know about Vivian Maier? She was a nanny who took candid photos on the streets of New York as she went about the city with her charges. There was even a film about her: http://www.vivianmaier.com/film-finding-vivian-maier/.
Here's an 18 x 24 art quilt honoring her, and Sandra Sider giving her comments:


Here's another piece, this one, like mine, a work in progress. The artist constructed this seahorse from dozens of sewn circles, called yo-yos, made from recycled prom dress fabric:

Part of the value of the critique process also enhanced the group dynamic, with all participants going into it as interested and invested art quilters. Satisfying all around.
I haven't told you about the accommodations yet. They were monastic and scrupulously clean. I slept like a rock in that little bed.


It was inconvenient to have the room's one electrical outlet on the opposite side from the bed. But that's why God invented extension cords.
So it was all good.
And I'm grateful to be able to come home to this:
 |
| My yard, late afternoon, Sunday, November 4, 2018 |
Monday, November 5, 2018
I went on a quilt retreat. I had no idea it would be like this.

Have you ever been on a weekend retreat? I've been on a few, usually of a religious/spiritual nature.
But never a quilting retreat. This past weekend was my first one, sponsored by the Connecticut chapter of the Studio Art Quilt Associates (SAQA).
It was a lot of fun in so many ways, and I'm going to tell you about a few of them. But first I have to tell you about the setting, because it blew me away.
This retreat was held at a place called the Incarnation Center, in Ivoryton, Connecticut. I'd heard of the place, but I had no idea it was situated on so many rolling, wooded acres. The property was laid out in such a way that trees and rocks had been left in place, with the result that each building, surrounded by trees, looked as if it were set into its own natural nook. I took this photo from a window of the building where the retreat was held. It gives an idea of the "nookiness" of the place.

Wrong!

I went exploring with my buddies Carol and Linda.

I could not believe that there was a cedar swamp on the property. This is a big deal to me, because although there are a few cedar swamps in Connecticut, they're not common by any means. I like them because they're so eerie and spooky, with shadows, and ferns, and trees growing out of still, mirrorlike water.


See the boardwalk in this photo? We were walking on that when Linda's phone rang. It was her son, calling from Florida. When she told him where she was at that moment, walking on a boardwalk through a cedar swamp, with me and Carol, he told her that she was getting 'way too in touch with her inner white girl!
But what a day for a walk. Everything you could want for a fall day, especially one that dawned so darkly, with wind and driving rain. By afternoon, the sky had cleared and turned blue, and though the wind stayed brisk, it had the advantage of bringing down cascades of leaves.
 |
| Carol catching leaves |
 |
| November roses. What a blessing. |
There was also a farm on the property, where Carol saw some llamas, and a mile-long lake.
Who knew?
I went to a quilt retreat and found all this.
And that's not even mentioning the warm camaraderie, kindled by a common passion, and the chance to have my work critiqued. And the food was good! I'll tell you about all that next time.
 |
| Camaraderie |
 |
| Critique |
Wednesday, October 31, 2018
Explorations Ending Episode: This is what Finally Happened

I spent five and a half months, from the middle of March 2018 to the beginning of August 2018, working on an all-consuming, and to me, high profile, quilt for an exhibit that would hang in the New England Quilt Museum until the end of 2018. The exhibit was called
Explorations: Journeys in Creativity: The Quilt Artist's Studio
This exhibit was to be a journey in creativity, taking viewers inside the quilt artist's studio. For that reason, participants were required to document their creative processes. I did that in the form of 17 posts on this blog, all of them captioned "Explorations: Episode (whatever)." These blog posts provide more information about the making of this quilt than most people would want to read, but they were required, and I'm a pretty detail-oriented gal. For purposes of the exhibit, I printed them all out and compiled them in a looseleaf. There were also images of my creative process presented at the exhibit, as well as in a book showing the work of all 24 artists in the show. https://www.amazon.com/Explorations-Journeys-Creativity-Inside-Artists/dp/1725938022/ref=sr_1_1?s=books&ie=UTF8&qid=1541018970&sr=1-1&keywords=Explorations+Journeys+in++Creativity#reader_1725938022
I'm writing today because I want to bring closure to this journey.
This last episode begins and ends on Saturday, October 13, 2018. That was the day of the opening reception for Explorations. I was one of 12 Explorations artists whose work would debut on that day. (The other 12 will have an exhibit in early 2019). Lowell is two and a half hours from where I live. Joe and I left at 7:45 a.m. so that we could tour some of the National Historic Park exhibits there. https://www.nps.gov/lowe/index.htm
This last episode begins and ends on Saturday, October 13, 2018. That was the day of the opening reception for Explorations. I was one of 12 Explorations artists whose work would debut on that day. (The other 12 will have an exhibit in early 2019). Lowell is two and a half hours from where I live. Joe and I left at 7:45 a.m. so that we could tour some of the National Historic Park exhibits there. https://www.nps.gov/lowe/index.htm

Lowell is home to a national historic park because of its status as an intentionally planned, and once-thriving, textile center. In Lowell, early industrialists noticed that the Merrimac River produced such a powerful rush of water that they built textile mills--and housing--there. First came the mill girls from nearby farms, then all kinds of immigrant families, including French Canadians and Greeks. It was quite a thriving, vital place.

I loved his work when I was in my formative years, not least because Jack Kerouac rode through life on a high-octane wave of sensation. I was drawn to the sheer force of his creativity and the exuberance of his spontaneity.
He is said to have written On the Road in one single, 20-day creative burst , on a 137-foot roll of taped-together paper,

fueled by benzedrine, caffeine, nicotine, and pea soup. Pea soup. That cracks me up. It's Quebecois comfort food.
I read Ann Charters' biography of Jack, https://www.amazon.com/Kerouac-Biography-Ann-Charters-ebook/dp/B00UFWVE08/ref=sr_1_3?s=books&ie=UTF8&qid=1541012985&sr=1-3&keywords=ann+charters, and that's when he started to lose his glow.
He was horribly sexist--well, I didn't need to read a biography to see that--and he ended up pretty much a dissolute alcoholic, dying in his fifties of cirrhosis of the liver, while living with his mother in St. Petersburg, Florida.
Still, he was French Canadian, one of the few of us to go on to greatness. And he was one of the first beats. His entourage in On the Road
 |
| The 1949 Hudson Commodore is widely considered the car driven in On the Road |
...was the progenitor of Ken Kesey and his Merry Pranksters,

and their itinerant ad-hoc lifestyle was the progenitor not only of sixties communes, but the Occupy movement and their tents.
Kerouac has been widely revered for his role in American culture. Here are Bob Dylan and Alan Ginsberg visiting his grave at Edson Cemetery in Lowell:

So Lowell thrived in its day, until competition from southern factories turned the mood sour, impelled the mill managers to ask more of their employees, and compelled the employees to strike. It was all futile: all the mills are gone. I asked one of the guards at the National Historical Park what economic engine runs the city now. He said UMass Lowell and the local hospital/health center.
Still, those mill jobs were considered desirable at first, giving farm girls a little independence. But they had to put up with a lot. This loom, one of a roomful, makes an ear-splitting racket. (The park employees who work there now have to wear ear protection.) There was also brown lung, and machine-caused damage to body parts, and sharing beds in crowded boarding houses.
 |
| The roaring looms in Loiwell's Boott Cotton Mill, now part of the Lowell National Historic Park |
Lowell's background in textiles is probably one reason the city is home to the New England Quilt Museum, the venue for the show that brought me to Lowell in the first place.

The opening reception for Explorations was on Saturday October 13, at 1 p.m., which gave me and Joe plenty of time (as long as we left the house at 7:45) to look at the Boott Cotton Mill and other exhibits of the National Historic Park.
Finally I got to see how my work had been presented.

Beautifully, it turns out. The museum created a banner for each of the 12 artists in this half of the show.

Here's a closer look at mine, which includes some of my process photos, as well as a shot of me after I broke my arm last June. I hope you can read it.
At the reception, four of the quilters gave slide show talks about their process and their work. I wish I had taken more photos because the reception turned out momentous for me.
I didn't know it was momentous until a woman came up to me after the talks and told me she had bought Sand and Foam. I was surprised speechless.

I'm so glad I got that piece appraised, because I doubt I would have put as high a price on it as the appraiser did. Now Sand and Foam is not only my most high-profile piece and the piece I worked longest/hardest on, it's now also the piece that brought in the highest price to date. For those reasons, I was kind of walking on air during the rest of the reception, and didn't have the presence of mind to take more photos of the reception itself and the other artists. I was so surprised.
Another high point was seeing Katie Fearon, who is my daughter Leah's age, at the reception. Katie (then Katie Tracey) was one of my Brownies at West Hartford's Morley School back in the day. Now she's an advanced practice nurse at a public health clinic in Lowell, and when she learned that I would be nearby for the reception that day, she stopped over to see me. I hadn't seen her for years, so it was lovely to catch up with her. She and her husband, who have three children, are living a sustainable existence on a piece of land in nearby New Hampshire, complete with Buff Orpingtons. Those are a kind of chicken.
I'm posting all this information now because I felt I needed to bring some closure to the project that inspired 17 previous posts. The only other information that will come my way, as far as I know now, is the book generated by this show. I'm waiting for mine to come. Here's what it's going to look like:
https://www.amazon.com/Explorations-Journeys-Creativity-Inside-Artists/dp/1725938022/ref=sr_1_1?s=books&ie=UTF8&qid=1541018970&sr=1-1&keywords=Explorations+Journeys+in++Creativity
Can't wait!
Tuesday, October 30, 2018
Today in the Garden: Looking for Hope
This is the kind of thing that keeps me sane in these horrifying, violent days: Gardening. Well, that and not watching TV. At all. Ever.
I find sanity in gardening because digging and pruning direct my attention in a more peaceful, and hopeful, direction than the dark tunnel of despair that is the news these days.
I'm choosing to shift my focus away from the New York Times and take a longer view.
I confess I do read the New York Times. Nevertheless a person needs to pull away from the paper.
By inserting these tiny red onion-lookalikes into the ground, I'm not just looking ahead to, I'm investing in spring. I'm putting these purple-red spheres into the ground under the row of roses that separates our driveway from our neighbors'. I want to see these bulbs produce squills. If they do, they'll look like this. Eventually, anyway:

When bulbs carpet the ground like this, that process is called naturalizing, or spreading informally and even haphazardly beyond the place of their original planting. Squills do that, as do snowdrops. Crocus do too, but you have to squirrel-proof the bulbs first. To do that, I buy a spray bottle of Ro-Pel (a rodent repellent that makes anything they want to eat taste awful) and pour the contents into a bucket. Then I soak the crocus bulbs in them over night. Then I dry them on layers of newspaper. This works. Also, the Ro-Pel tastes vile, if you ever get it on your lips by accident. Bitter.
But I didn't want to deal with squirrel-proofing crocus bulbs this year. Instead, I bought a bag of 50 Spring Beauty squill bulbs (scilla siberica) from White Flower Farm:

I planted them in five groups of ten under the roses:

The roses aren't doing much right now except displaying their hips:
 These hips are growing because I didn't deadhead the roses last summer. If I had deadheaded all summer --cut off the spent blooms--we would have had more of a display of flowers over a longer period of time. Instead, I was distracted last summer by the necessity of producing a 30 x 50 piece for a high profile exhibit at the New England Quilt Museum. Deadheading the roses wasn't real prominent on my radar screen last summer.
Besides, I reasoned, the fruit-eating birds can have the rose hips all winter. Well, I haven't seen any fruit eaters on those rose hips. We have families of catbirds that live in the Norway spruces behind our garage, attracted by our grapes and blueberries. But the catbirds must have migrated, because nobody is getting these rose hips. Well, at least the hips, growing between two driveways, are providing a jolt of color against the black of the asphalt.
I've never been thrilled by these roses. They came with the house, so I take care of them. According to the late Donna Fuss, the former rosarian at the Elizabeth Park Rose Garden, my roses were the product of a breeder named Walsh, and are a variety called either Minnehaha or Lady Gay. She wasn't sure which. In either case, they're extinct, she said. I guess that means that growers no longer produce them commercially. That's no big whoop. These roses are small and thorny and a dozen to a thorny stem, about 1 inch across.
I'm not crazy about them, but I take care of them.
If I had chosen a rose to grow along my driveway, I would have chosen a long-stemmed, cup-shaped, David Austin beauty like this one:
Nevertheless, I wasn't around in 1927 when this house was built and (presumably) these now-extinct roses were planted. Instead, I inherited the roses, and I do what I can with what I have. I'm certainly not going to rip them out. I prune them hard every spring and feed them every summer.
By planting squills under this row of roses, I'm throwing a line out into the future, knowing that the line will be caught.
And so amen and let it be so.

I find sanity in gardening because digging and pruning direct my attention in a more peaceful, and hopeful, direction than the dark tunnel of despair that is the news these days.
 |
| These are the bulbs of Siberian squills, scilla siberica. But they look like tiny red onions. |
I'm choosing to shift my focus away from the New York Times and take a longer view.
Read not the Times. Read the eternities.
--Henry David Thoreau
I confess I do read the New York Times. Nevertheless a person needs to pull away from the paper.
By inserting these tiny red onion-lookalikes into the ground, I'm not just looking ahead to, I'm investing in spring. I'm putting these purple-red spheres into the ground under the row of roses that separates our driveway from our neighbors'. I want to see these bulbs produce squills. If they do, they'll look like this. Eventually, anyway:

When bulbs carpet the ground like this, that process is called naturalizing, or spreading informally and even haphazardly beyond the place of their original planting. Squills do that, as do snowdrops. Crocus do too, but you have to squirrel-proof the bulbs first. To do that, I buy a spray bottle of Ro-Pel (a rodent repellent that makes anything they want to eat taste awful) and pour the contents into a bucket. Then I soak the crocus bulbs in them over night. Then I dry them on layers of newspaper. This works. Also, the Ro-Pel tastes vile, if you ever get it on your lips by accident. Bitter.
But I didn't want to deal with squirrel-proofing crocus bulbs this year. Instead, I bought a bag of 50 Spring Beauty squill bulbs (scilla siberica) from White Flower Farm:

I planted them in five groups of ten under the roses:

The roses aren't doing much right now except displaying their hips:

Besides, I reasoned, the fruit-eating birds can have the rose hips all winter. Well, I haven't seen any fruit eaters on those rose hips. We have families of catbirds that live in the Norway spruces behind our garage, attracted by our grapes and blueberries. But the catbirds must have migrated, because nobody is getting these rose hips. Well, at least the hips, growing between two driveways, are providing a jolt of color against the black of the asphalt.
I've never been thrilled by these roses. They came with the house, so I take care of them. According to the late Donna Fuss, the former rosarian at the Elizabeth Park Rose Garden, my roses were the product of a breeder named Walsh, and are a variety called either Minnehaha or Lady Gay. She wasn't sure which. In either case, they're extinct, she said. I guess that means that growers no longer produce them commercially. That's no big whoop. These roses are small and thorny and a dozen to a thorny stem, about 1 inch across.
 | ||
| This is a photo of the Walsh rose, Minnehaha, which may or may not be the name of the one growing along my driveway. Mine are more of a garish shade of fuchsia. And you can't pick just one. You have to pick a whole gnarly, thorny stem of about six or eight. |
I'm not crazy about them, but I take care of them.
If I had chosen a rose to grow along my driveway, I would have chosen a long-stemmed, cup-shaped, David Austin beauty like this one:
 |
| This is a David Austin rose called Teasing Georgia |
Nevertheless, I wasn't around in 1927 when this house was built and (presumably) these now-extinct roses were planted. Instead, I inherited the roses, and I do what I can with what I have. I'm certainly not going to rip them out. I prune them hard every spring and feed them every summer.
By planting squills under this row of roses, I'm throwing a line out into the future, knowing that the line will be caught.
And so amen and let it be so.

Subscribe to:
Posts (Atom)