Saturday, March 31, 2018

Explorations Episode 6: Shirr Am Learning the Hard Way

 Explorations Episode 6:  Shirr Am Learning the Hard Way

The only way I ever learn anything is the hard way.  Especially with my current art project: trying to make a piece of heavy silk charmeuse look like an undulating wave of sea foam.

OF COURSE it's challenging!

There's a lot of trial and error involved.  Here's how one of the errors happened.

The charmeuse had been white, so I painted it in colors that I thought matched the foam in the photo.


I think the colors look pretty close to the ones in the original photo.  But the mistake I made, if it was one, is that I also put GAC 900 on the silk charmeuse before I painted it.  The GAC 900 was supposed to fill up the interstices in the fabric and prevent the paint from soaking through it and ending up on my work surface.


I also hand-sewed eight lines of large stitches across the width of the silk.

By pulling on the long strings of these stitches, I should be able to gather the silk in parallel gathers, a process known as shirring.

shirr
SHər/
verb
gerund or present participle: shirring
  1. 1.
    gather (an area of fabric or part of a garment) by means of drawn or elasticized threads in parallel rows.

    "a swimsuit with a shirred front"
 But the GAC 900 gave the painted fabric a rubbery feeling.  So when I went to gather it, it was stiff and plastick-y.  Well what did I expect?  GAC 900 is an acrylic polymer.  Thus, plastic.  I didn't want to lose the paint, so I used the GAC, so I wouldn't lose the paint, but that made the fabric feel stiff and rubbery.

I shirr am learning the hard way here.


 I pulled the gathering stitches but the result of the combination of the painting and the GAC made the silk much less pliable.

 If I use this technique in the final product, I'll manipulate the gathers, spread out the fabric within the folds, sew on beads, and add hand embroidery and machine stitching, all of which will flatten it out somewhat.  And the dimensionality of the texture is an issue because this quilt MAY have to be stored in a roll, whenever it's not hanging on the wall at the New England Quilt Museum, which is its ultimate destination.  The flatter it is, the easier it will be to roll, and the less likely it will be negatively affected by the rolling.  So it's in my interest to make it flat.

The GAC made it so stiff it wouldn't be easy to manipulate or easy to roll.  So I decided to see what the fabric felt like if I put on the paint without the GAC:


It was a little stiff, but not as rubbery, so I decided to ditch the GAC.

On my second attempt to recreate this band of foam, I applied the paint without the GAC:


In this second attempt, I won't be shirring the silk charmeuse.  Instead, I'll be using this special stuff called Fabric Magic a steam activated shrinking interfacing:


What I'm going to do is layer the painted silk with a same-size piece of Fabric Magic.  Then I'll sew lines parallel to the undulant edge of the foam. Once those lines are sewn, when the Fabric Magic is exposed to steam, like from an iron, the silk will pucker along the sewn lines.  And maybe it will look like the foam in the photo.  I had to cut the silk 30 percent larger for this reason.

That's my next trial in this trial and error process.  Shirr am learning the hard way.


Friday, March 23, 2018

Explorations, Episode 5: This Shirr is Fun!

Explorations, Episode 5: This Shirr is Fun!


I'm working on an art quilt that doesn't have to be completed until August, and to get ready to work on it, I'm making scale-size practice pieces, each inspired by a different image.  The idea is that making these practice pieces will help me decide which of four images to use for the final piece.

I finished my first scale-size practice piece last week, and the results were... so-so. You can read about that here:  http://stitching-it-all-together.blogspot.com/2018/03/explorations-episode-4-first-practice.html


Today, charging on, I'm working on a second practice piece.  This one will be based on this image:


This image, I have to admit, is the very one I intended to try when I entered this contest.  I always wanted to try to replicate that exquisite foam, as elegant in its way as the ermine trim on a royal robe.  For this exhibition, I'm required to use felting and thread painting.  The ripples on the right will be felted, then embellished with thread painting and beads.  As for the foam, I'm planning on making that out of some kind of silk.

For that purpose, I acquired

Silk habotai 
Silk gauze   
Silk chiffon  
Silk crepe de chine 
Raw silk
Smooth raw silk
Lightweight raw silk.  

I'd already made a pattern for this practice piece, and I started  construction by felting the sand ripples on the right:


You see that piece of green yarn?  I used that to measure the length of the line of foam.  Starting at the upper right there, and going down to the lower left, the line of foam is 32 inches long.  I adjusted this to 36 inches long, which definitely couldn't hurt.  The width across is about 8 inches at the widest.  I multiplied that by three to give the foam some gathered fullness.  So the width of the piece of silk I would cut to make the foam would be 24 and its length would be 36.  

Which of all those silks to try?  At random, I put my hand on heavy silk crepe de chine.  I cut a piece 24 inches by 36 inches, taped it down to my table, and drew lines across it where I would put large stitches which I would then gather.  Actually, this is called shirring, a type of gathering. It shirr is fun.


 I took a marker and drew lines about every eight inches across this piece of silk.  Then I machine basted across these lines and pulled up the machine stitches to gather it.  But the machine stitches broke from the pulling, so I had to rip them out and start again.  This time, I added more rows, to make them every four inches instead of every eight.  And you know what I did then?  I hand basted these lines, using double threads, and shirring each line in two separate zones:  for each line, one set of gathering threads from the right to the middle, and another set of gathering threads from the left to the middle.  This way, I would have the flexibility to gather the "foam" loosely on one side and more tightly on the other if I so chose.


See what I did?  Each line of marker is being gathered in two separate zones.  I can adjust the gathering threads to take on the look of the foam.

As a preliminary, I gathered all the lines of thread:


 and spread the newly-shirred piece of silk onto the partially-felted sand ripples:


I think they're ballpark, and not bad for a practice.

Now I have to take that silk and paint it in colors such as those found on the foam in the photo.  I got out my Jacquard Lumiere paints


...and came up with some colors that I think are plausible for the foam:


  I think these golds and tans are a good start.  So in order to apply these colors to the piece of silk that will become the line of foam, I have to gently undo the practice shirring without pulling out the gathering threads, spread the silk out flat, and paint it with these colors, all mixed with GAC 900 to prevent all the color from soaking right through the weave of the silk.  Painting is going to be my next step.

This shirr is fun! 


Sunday, March 18, 2018

Explorations, Episode 4: First Practice Piece is Done. Watch Me Critique It!

Explorations, Episode 4:  First Practice Piece is Done.  Watch Me Critique It!

I've been working on this first practice piece for a week, and now I'm going to declare it done.  I'm practicing because I'm intimidated:  the pressure is ON for me to create a 30 inch by 50 inch piece, using felting and thread painting, to hang in the New England Quilting Museum, no less. I want that piece to be good.

So, I'm making scale-size practice pieces.  This one is my first.  I wanted to reassure myself of my felting and thread painting skills.

My last post followed the progress of this practice piece for the past few days.  Yesterday, I got out my electric felting machine and subjected the almost-done piece to its barbs:

I don't know whether you can tell from this picture, but a felting machine looks a lot like a sewing machine, but with no thread, and many more needles.  Those needles go down through that wool roving and compress it together with their tiny barbs.  In fact, that's what these machine quilting needles are called:  barbs.  A trip under those barbs yesterday tamed the fuzzies on this piece.

Then it was time for thread painting.  I wanted to make sure I could choose and apply the colors of thread judiciously.  So I did this little trial exercise for myself to help me choose the thread for the thread painting:


It wasn't worth the effort.  I didn't put down enough roving for this practice piece to be a fair equivalent.  Besides, it looked like I couldn't go wrong with any of the colors I had in mind. So I just went ahead and thread painted, starting with the tidal pool at the  center of the scene:

Then I thread painted the tidal creek just beyond the sand fingers, and after that the marsh grass and trees on the other side, and finally, the sky.


This is bad!


Now I'm going to critique the practice piece:

The ripples across the bottom 1/4 of the piece are too dominating.  My original image is landscape orientations, but for this show my piece must be portrait orientation.  For purposes of making this transition, I had to capture a long narrow slice of my image.  I extended an imaginary inch at the bottom and the top of the photo.  Thus the large sand ripples at the bottom are an imaginary extension and extrapolation of the actual ripples in the photo.  In my rendition, they're too dark, too big...and sort of creepily humanoid, some of them.  If this were my actual piece I would forget about extending the bottom an imaginary inch to get it to scale.  Instead, I would put both extra, needed inches on the top only and eliminate the bottom several inches, like this: 


My rendition lacks the extreme luminosity of the original.  For example, the color of the water in the tidal pool isn't bright enough.  I went over that pool with many kinds of glittery and shiny specialty threads, but it's still not as bright and reflective as the water in the photo.  Now I think I should have felted it with more white, especially at the top fingers of the pool.  That's one thing I'll change if I choose this image.

The thread painting in the sky is lame.  Surely when I do a sky in my real piece, the thread painting will be more imaginative than this:


That's all. Fini.  Finito.  You can tell me what you think, or not.  Either way, I'm glad I did this practice piece.

Onward!


Friday, March 16, 2018

Explorations, Episode 3: My First Scale Size Practice Piece

Explorations, Episode 3: My First  Scale Size Practice Piece


I intimidated myself last week.  I'm making scale-size practice pieces for an upcoming exhibition, Explorations:  Journeys in Creativity. http://www.saqacallforentryexplorations.com/.

My actual entry doesn't have to be completed until August 1, so I gave myself the leisure, and the task, of creating four scale size practice pieces to see which one I wanted to do for the real deal.

Of those four, I got to the starting line on this piece involving sand ripples and an undulant ribbon of frothy foam:


but as I collected my materials, I felt a bit daunted by the idea of of shirring the fabric for that lovely undulating wave of foam. I'm going to do it, but...I decided to begin again with something less intimidating.

Like this:

I chose this piece for my first, throat-clearing practice, and this is what I've done with it over the past week:

Saturday, March 10
Tuesday, March 13


Wednesday, March 14
Friday March 16
My next step with this piece will be to add texture with quilting and thread painting.

Meanwhile, just so you know, this is how I blended colors of merino wool roving to make the glowing orange highlights on the sand ripples:

I started with two colors


And layered them one on top of the other on my carders


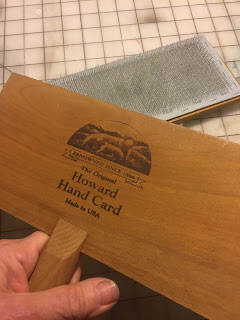
I put the two carders hook side down on each other and pulled the two handles in opposite directions from one another

And voila, this lovely pile of soft golden glowing roving, perfect for the highlights on sand ripples.


Tuesday, March 13, 2018

Explorations, Episode 2: Voluptuous Folds

Explorations, Episode 2:  Voluptuous Folds

At long and much-wished last, I get to re-create this image in fiber.  Maybe I'll call it Sand and Foam.
In my last post I described the process of creating 4 scale-size mock-ups of four different images as a way of deciding which to use for my final product for this exhibit,which is to be a 30 x 50 piece.   


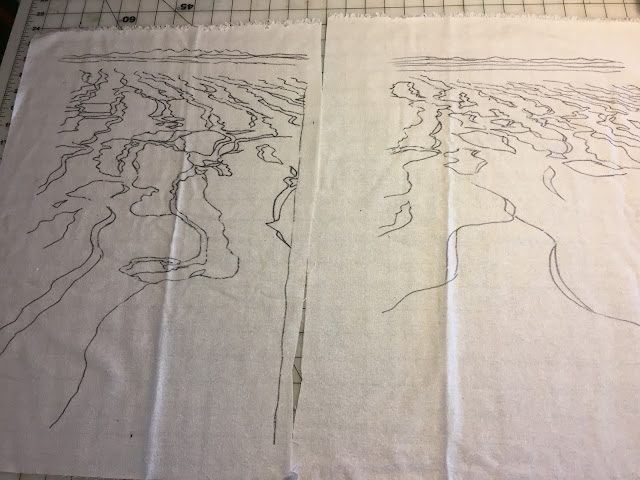
Here are two of my four practice patterns, traced onto raw silk in preparation for needle felting


Here are the other two patterns, traced onto raw silk and then layered on pieces of commercial felt in preparation for needle felting
Today I want to focus on the pattern on the left, because, well, look what it's based on!


This image has been haunting me ever since I took it.  I'm visualizing the foam as some sort of shirred silk, painted these gold and champagne colors and embellished with beads and metallic thread.  The ripples will be felted and embellished with thread painting.  That image became this pattern:

And the pattern was traced onto a piece of raw silk, which was then layered onto a piece of commercial felt in preparation for needle felting:

I'm so psyched about re-creating the voluptuous folds of this elegant but earthy foam that I bought several different fabrics to try, most of them silk.  I chose silk because it's pliable without being slippery.  Synthetic sheer fabrics, by contrast, tend to be both slippery and stiff.  I think silk would be much better at forming itself into those voluptuous folds.  So I acquired a lot of it, most of it from Dharma Trading  https://www.dharmatrading.com/

Silk habotai and silk gauze.  My silk gauze is very lightweight at 30 momme, where momme is a measure of the heaviness of silk.  It's pronounced "mommy."  Ya gotta love it! Wikipedia says that silk habotai is a basic plain weave, quite easy to dye.  My silk habotai is 16 momme. 
Above, silk chiffon and silk crepe de chine.  Wikipedia says that chiffon is a plain woven sheer and crepe de chine is a fine, lightweight silk with a plain weave.  The silk crepe de chine on the right above is 12 momme, which isn't very heavy. 

 The heavy crepe de chine, right above, is 30 momme.  But it doesn't feel heavy to me.

Raw silk, smooth raw silk, lightweight raw silk.  The raw silk on the left, 35 momme, has a nubby texture and forms the foundation for these practice felted pieces. The smooth version in the middle is 31.5 momme and the lightweight version is 22 momme.  I've never tried the smooth or lightweight versions.

I also acquired some of the silks' lowly companion, unbleached cheesecloth

Which of them do you think will work better for those foamy folds?

I'm going to seek the guidance of one of my favorite books:


Are you familiar with this one?  Check it out:


 https://www.amazon.com/Art-Manipulating-Fabric-Colette-Wolff/dp/0801984963/ref=sr_1_1?ie=UTF8&qid=1520968170&sr=8-1&keywords=the+art+of+manipulating+fabric&dpID=51%252BdqUyJuIL&preST=_SX218_BO1,204,203,200_QL40_&dpSrc=srch


 It includes an entire chapter on shirring alone!

I'm thinking that shirring may be the way to go on those foamy folds.  Look at some of the things you can do:


I'm going to look for ideas in the shirring chapter, then practice on some of these materials.  Does the paint color the fabric before or after the shirring? I'm not sure.  Stay tuned.